Rocket League Split Screen on PC with Keyboard and Controller
You'll never game alone
Rocket League is a great game for split screen! At least for console gamers - the PC crowd was apparently partially forgotten in this area. While split screen pretty much works out of the box if you have two Xbox 360 for PC controllers, you are left hanging if you have only one such controller, or are using generic USB gaming controllers. Luckily, the TocaEdit Xbox 360 Controller Emulator comes to the rescue, enabling you to play split screen using the keyboard and one controller, and also adding more controllers as you see fit. Read on for a detailed guide.
Step 1: Download TocaEdit Xbox 360 Controller Emulator
Also known as x360ce. The program will emulate an Xbox 360 controller and also enable us to change what player the controller maps to. Download from here - and make sure to click "Download for 32-bit games".
Update: As pointed out in the comments, Rocket League also has a 64 bit DX11 client (as of spring 2020). Make sure you are using the correct version (32/64 bit) of x360ce depending on the bitness of your Rocket League client.
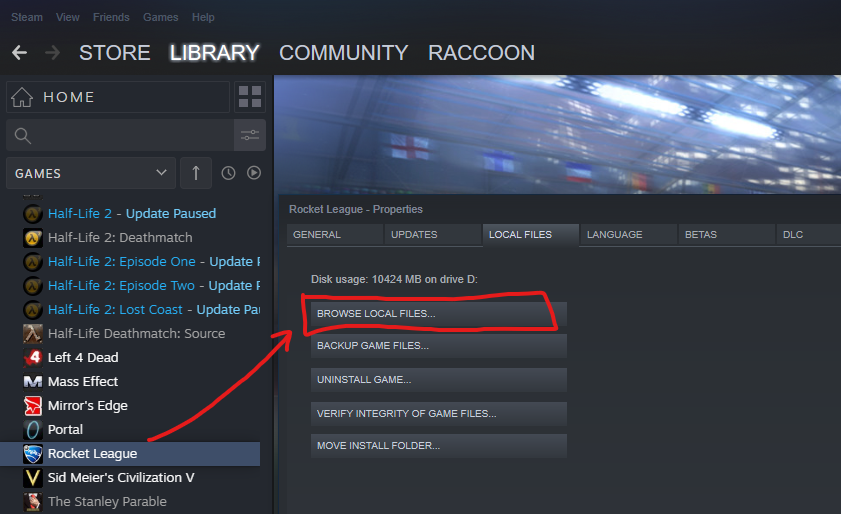
Step 2: Locate the Rocket League directory and copy x360ce.exe
First off, start Steam if it is not already running.
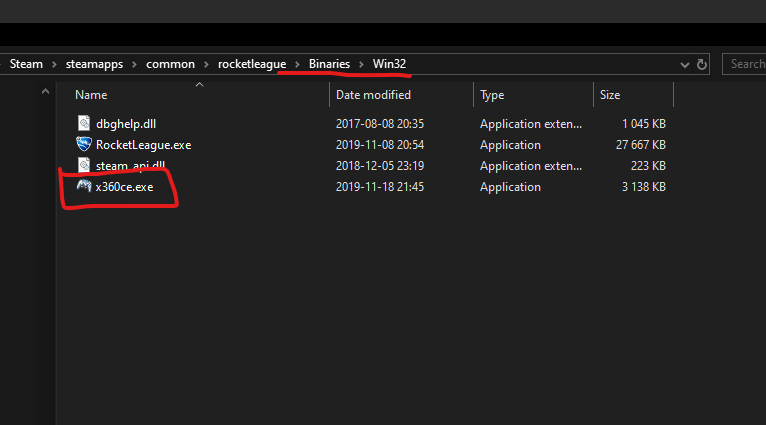
After opening the folder, navigate to the subfolder Binaries\Win32 - the RocketLeague.exe is located here. Note that in case of the 64 bit client, the path says "Win64" instead.
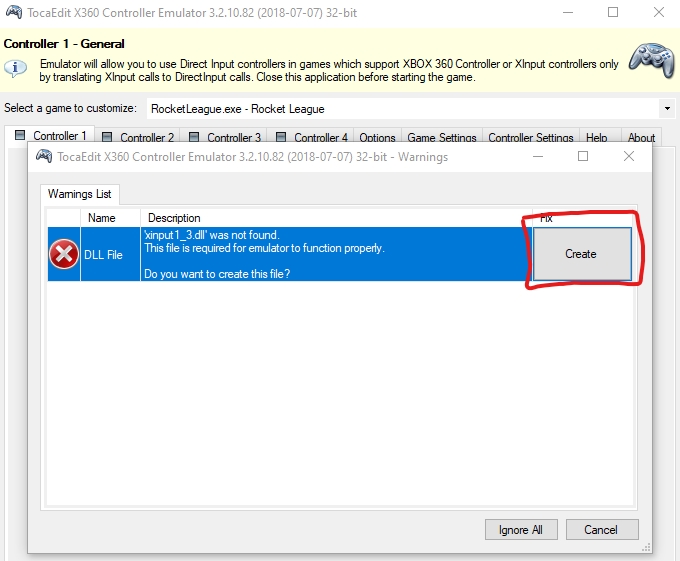
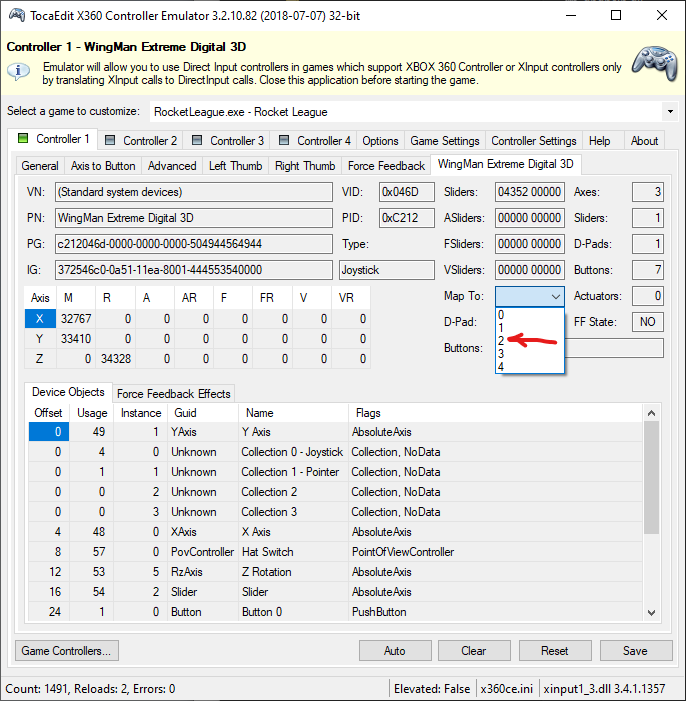
Step 3. Set up the controller and map to Player 2
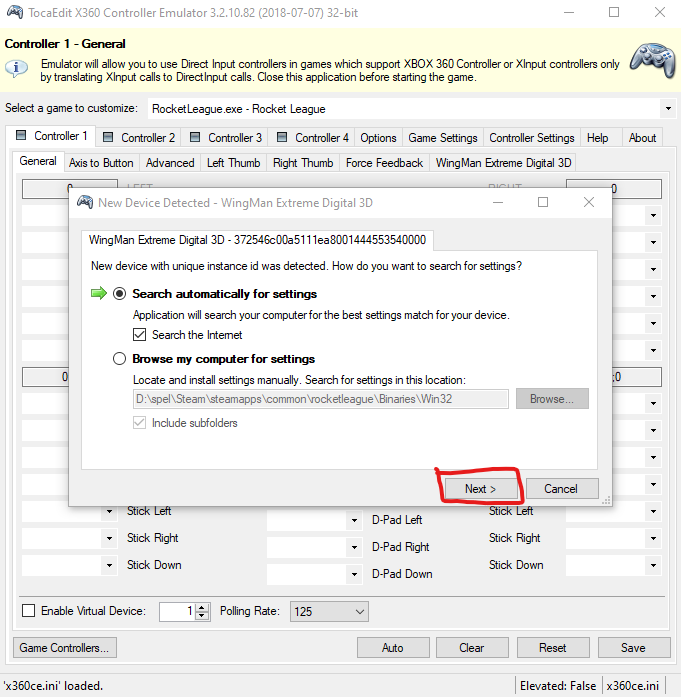
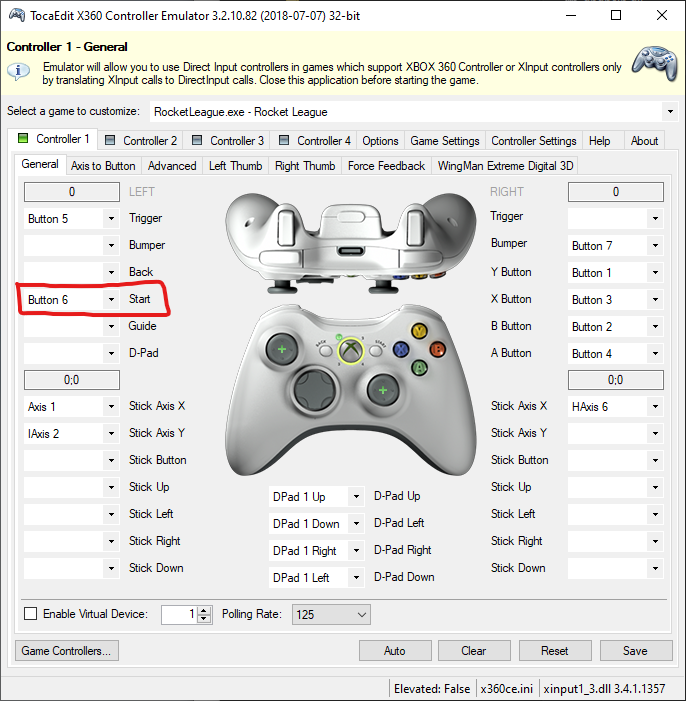
Double-click x360ce.exe to set up the controller.
We're done here, so hit save and close the program.
Step 4: Play Rocket League!
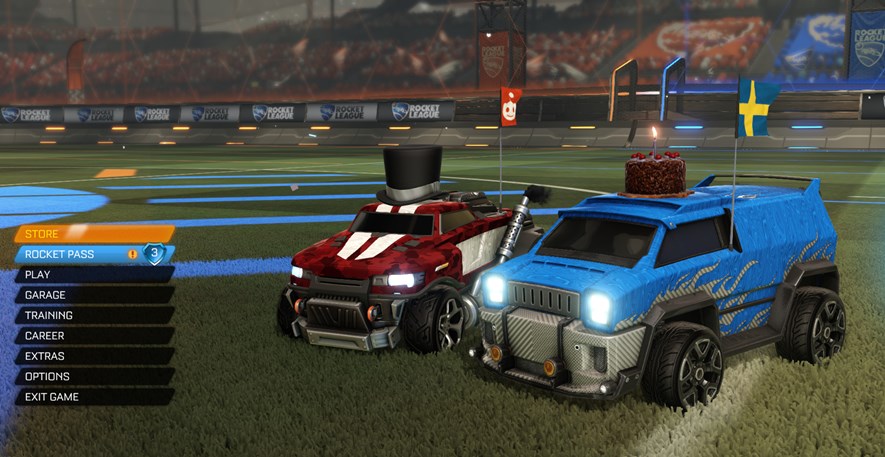

Good thing is, once this has been set up, there is no need to do it again. Just make sure the controller is plugged in and start Rocket League from Steam as usual, then join by pressing start. Have fun!
13 Comments
Subscribe to new comments by RSS